 Timewise 797A
For more information on Timewise products contact:
Jack Christensen
chronos@northshore.net
847-550-5052
Do not attempt to run a rally on the same day you install the 797A. In fact, it is highly recommended that you use the instrument under simulated rally conditions before running an actual rally. Without the pressure of having to stay on time, familiarization and confidence in the instrument will develop rapidly. As with everything else, practice makes perfect. When you are comfortable using the 797A, you will be able to concentrate on navigating the rally course rather than the front panel of the instrument.
CAUTION! Do not touch the metal surface of the voltage regulator on the back of the 797A. The regulator is covered with a protective plastic cover, but this cover can be dislodged, thereby exposing the metal surface of the regulator. If an electrical connection is made between the regulator and any metal on the vehicle (or any other metal on the 797A) a short circuit will occur and the 797A may be damaged. Take extreme caution to prevent this from happening. Also, do not tighten the screws that hold the voltage regulator (and its plastic cover) to the heat sink. If you turn the screws, you will break wires inside the 797A.
Three #12 pan-head tapping screws (you may need washers) usually provide sufficient mounting stability, without causing any interference. Use short screws that won't damage the vehicle wiring or ductwork, or interfere with controls below the surface of the dashboard. Drill shallow pilot holes for the same reason. If you examine the dashboard, you may find that you can hide the mounting holes along the edge of decorative trim or camouflage them within the design. When the bracket is removed later, you don't want your "bodywork" on the dashboard to ruin the appearance of the vehicle.
You may prefer to use Velcro strips to attach the mounting bracket to the dashboard so that you won't have to drill holes. Velcro is available at most hardware stores. When using Velcro, purchase the type with pre-applied adhesive on its back, rather than the type that requires an application of glue. Glue generally doesn't adhere as well as the adhesive and often fails after a short time because of temperature extremes within the vehicle. Glue also leaves a terrible mess if you remove the strips later.
Another excellent attachment method is to use double-sided adhesive foam tape (picture hanging tape). This material forms a more rigid mount than Velcro strips. Applying two or three short strips of foam tape, instead of a single long piece, allows the bracket to straddle a slightly curved surface on the dashboard.
When selecting a mounting location, avoid placing the 797A high on the dashboard out of easy reach. Most navigators cannot comfortably operate the instrument with an extended arm. A lower position, perhaps must above the glovebox, usually provides easier access. Such a location is also out of direct sunlight much of the time, thereby keeping the instrument cooler. Choose a location that will not present a safety hazard during hard braking or sudden turns.
As an alternative to mounting the 797A on the dashboard, some rallyists place it within the glovebox. Such a location can provide a degree of security against theft. However, heat generated by the instrument will be confined to the close quarters of the glovebox. Fresh air is needed to cool the heat sink and surrounding metal on the rear panel of the 797A. (Please read Appendix B for warnings about overheating the 797A.) In addition, it may be difficult to reach the ON-OFF switch on the rear panel. Finally, the driver may have difficulty glancing at the displays if they are partially hidden within the glovebox.
You can recess the 797A into a cutout in the dashboard or center console. However, once again, air circulation around the instrument will be restricted and overheating may occur. Also, a remote power switch would certainly have to be installed to turn the 797A on and off without removing it from the cutout.
If you do decide to recess the 797A into the dashboard, you may find it convenient to remove the rear bezel. When this is done, the top and bottom vent panels can slide out. Do not let them fall into the instrument or behind the dashboard. You could inadvertently short out an electrical circuit or mechanically interfere with a vehicle control. The heat sink and cables that extend from the back of the computer require about 1.5 inches of clearance. Don't forget to take them into account before you start cutting holes. Use considerable planning and a lot of common sense if you modify the dashboard or center console.
The 797A driver's module is generally mounted with Velcro or foam tape. Velcro is often preferred here because it allows easy removal of the module. The mounting location does not necessarily have to be on top of the dashboard directly in front of the driver. Some rallyists position the module slightly to one side of the driver or place it on the steering column in front of the instrument panel.
When locating the driver's module, lay the cable that attaches it to the 797A neatly along the edge of decorative trim or next to the windshield. If possible, do not lay the cable right over a blower motor located within the dashboard. Blower motors radiate incredible amounts of electrical interference that can cause a malfunction in the 797A. See Appendix B for more details.
Regardless of the mounting method you select, make certain both the main computer and driver's module are mounted securely. If they are loosely attached, they may become dislodged by a bump, sudden acceleration, or hard braking. Also, avoid mounting them at such an angle that sunlight reflects off the panels into your eyes. Don't forget this warning when installing the 797A while in a garage or at night.
There are three electrical connections that you must make to assure correct operation of the 797A. In addition to the standard positive and negative electrical connections, it is also necessary to attach a heavy gauge ground wire to the 0.250 inch male spade lug terminal on the rear panel of the instrument. A proper ground assures that electrical noise and static discharges to the front panel of the 797A are dissipated along a path that doesn't interfere with the power supplied to the instrument. If you do not properly ground the 797A, it may fail in the presence of radio transmissions and other electrical noise.
Grounding the 797A is accomplished in a similar manner to grounding the radio in your vehicle. All you have to do is run a length of heavy gauge wire from the rear panel to a nearby screw or bolt on the chassis. The thicker the wire, the better. You can't get too thick. Also, the shorter the run of wire, the better. A foot is long, here. Three feet is too long!
The power connections of the 797A must be made with the utmost of care. The red wire must be connected to the positive (+) potential of the vehicle's power supply. The wire must make continuous contact to a circuit that is not switched off anytime during driving, starting, or parking. The black wire must be connected to the negative (-) potential of the battery. Attaching both leads securely in mandatory as just a momentary loss of power will cause a malfunction. Do not use a cigarette lighter adapter plug. Such a loose fitting connector just invites trouble.
A good attachment point for the red wire is at the fuse box. Here, the positive potential cable from the battery brings uninterrupted power to all circuits in the vehicle. The red wire is supplied with a slip-in connector that may fit between a fuse and its holder. Several other attachment methods include: attaching to the power distribution panel screw terminals provided in some vehicles, removing the fuse box and attaching to a terminal on its underside, soldering (or crimping) directly to the 12 volt cable connector at the battery terminal, or tapping a circuit that always powers an electrical accessory (e.g., a clock or cigarette lighter).
If you attach the positive (red) wire to a circuit already protected by a fuse, keep in mind that a problem elsewhere in the vehicle may blow that fuse and disable the 797A. Make certain that the vehicle fuse is free of corrosion and makes continuous contact with its holder.
Connection of the negative (black) wire can be to a screw or bolt on the chassis that is near the point of attachment for the red wire. The connection must be free of dirt, oil, grease, and paint. Do not over tighten the connection, as you may weaken the wire by breaking some of its fine strands.
IMPORTANT! The red and black wires must be attached to points that are as close to each other as reasonably possible. In addition, the two wires must be twisted around each other approximately one turn for every inch of travel. Do not attach the black wire to some point on the chassis directly behind the computer and run the red lead a long distance to the fuse box or battery. By doing so, you create a huge antenna that can pick up all manner of radiated energy. Such energy cannot be filtered out of the power line without prohibitively expensive electronics. The connection for the black wire must be near the attachment point for the red power lead.
Take particular care when connecting the black wire to the vehicle. The outside of the 797A may be electrically connected to the black wire. If you connect the black wire to the positive potential of the vehicle when the instrument case or bracket is touching any metal on the vehicle, you may cause a direct short in the vehicle's electrical system. There is no fuse between the black wire and the instrument case. Although you would not damage the electronics within the 797A, the short could possibly start a fire. Should the black wire contact a fused circuit in the electrical system, you would, as a minimum, blow the fuse protecting that portion of the vehicle's electrical system.
Make sure the cable between the battery's negative terminal and the chassis is clean and secure. If the vehicle chassis is isolated from the negative side of the battery, choose a connection point for the black wire at a convenient location along a negative potential line. In such a case, run a separate heavy gauge ground from the rear of the 797A to this same point.
IMPORTANT! When routing the red wire, make certain that the fuse holder has some freedom of movement. If the fuse holder is held too tight, a spring inside the fuse holder could be compressed if the red wire is pulled. The fuse will then lose electrical contact with the ends of the wire. (This may occur only when the vehicle is jarred by a bump in the road.)
On the other hand, do not let the wires hang too loose, or the navigator may snag the wires with his or her foot. Also, be careful when routing wires around the glovebox or among movable cables and levers. The wires may be pulled when the glovebox is opened or control levers are moved. Wires placed below floor mats or carpeting can likewise be pulled when stepped on.
The distance between magnet and transducer may be reduced to essentially the point at which the two pieces touch each other. However, since there is always some vibration of the elements in the installation, too small a gap risks the chance of the magnet and transducer hitting each other. Mounting the magnet and transducer too far apart will cause the transducer to work erratically, only at low speeds, or not at all.
Note that there are two odometer inputs on the rear of the 797A. Either input can be used at any time. To use both inputs, you need two odometer transducers. They may be of different types (one may be from the vehicle odometer, the other from a wheel). If you have only one transducer, install the supplied jumper plug into the unused input. This allows that input to use the signal supplied to the other transducer input. In this manner, you will have one transducer feeding two inputs. Selecting either input selects the same transducer.
If you plan on using a transducer other than one supplied with the 797A, you will need an adapter cable to connect to the "eight contact unkeyed modular jack" used on the 797A. Your TIMEWISE dealer can provide cables with an eight-contact modular plug on one end and a mating connector for another brand of transducer on the other end for a nominal charge. Do not use a four or six contact modular plug. Such plugs will damage the eight contact jacks.
If you turn on the 797A with the SPLIT-SET CLK toggle switch in the SPLIT position, you will see a five-character code in the ODOMETER display. This code indicates the date of manufacture, the operating firmware version, and the serial number of your 797A. If you call with a question about your 797A, please be familiar with the five-digit serial number in your unit.
Note: These instructions assume you are using the timing mode of hundredths of minutes when describing the operation of the 797A. When timing in seconds, substitute "seconds" in any reference to "hundredths of a minute".
The four "+ / -" adjustment toggle switches are used to alter the parameters of the 797A. Each switch alters a parameter by a specific amount:
The .01 switch increases (+) or decreases (-) the selected parameter .01 unit with each activation of the switch. If this switch is held in either position for more than a half second, the parameter will change at a rate of .10 unit per second until the toggle handle is released. This switch is inactive when setting a rally speed.
The .10 switch increases (+) or decreases (-) the selected parameter .10 unit with each activation of the switch. If this switch is held in either position for more than a half second, the parameter will change at a rate of 1.00 unit per second until the toggle handle is released.
The 1.00 switch increases (+) or decreases (-) the selected parameter 1.00 unit with each activation of the switch. If this switch is held in either position for more than a half second, the parameter will change at a rate of 10.00 units per second until the toggle handle is released.
The 10.00 switch increases (+) or decreases (-) the selected parameter 10.00 unit with each activation of the switch. If this switch is held in either position for more than a half second, the parameter will change at a rate of 100 units per second until the toggle handle is released.
The split mode is generally used each time you enter a checkpoint. While the 797A is split, you can record the course parameters that were frozen at the checkpoint in-line. (As explained later, the 797A is also split when CAST is selected on the CAST-RESTART toggle switch.)
For example, you can use this feature to set the main odometer (or any other adjustable parameter) to a particular value, even while you are moving. Here's how:
The clock may be run in either hours, minutes, and hundredths of minutes (11:59.99); or hours, minutes, and seconds (11:59:59 - notice the colon (:) between the minutes and seconds). The mode of operation you select will be a matter of convenience. If the rallymaster has used "seconds" in the instructions, you might find it easier to operate in that mode; or, you might wish to use "hundredths" anyway, to get an apparent improvement in timing accuracy.
The counting mode of the clock may be changed at any time. To change the mode of the clock, rotate the rotary switch to the SELECT position then activate the "+ / -" .01 toggle switch. Each time you activate the switch, either up or down, the 797A will change the counting mode between "seconds" and "hundredths". Notice that beneath the switch there is a designation "HUN/SEC" - this serves to remind you of the function of the "+ / -" .01 toggle switch when SELECT is chosen on the rotary switch.
One advantage to being able to change the counting mode of the clock is evident when setting the clock at the beginning of the rally. You will find it easier to use the "seconds" mode when aligning to WWV or another broadcasted time standard, and then switch to "hundredths" to run the rally. (Of course, always confirm that the rallymaster's clock is set to that same time standard you use. Aligning to the rallymaster's clock is always a better idea.)
The important point here is that you can select either counting mode at any time during operation of the 797A. You can also switch between the modes as often as you like, whether or not the 797A is split. There is no introduction of a timing inaccuracy when you do this.
With SET CLK selected, use the "+ / -" toggle switches to adjust the split value of the clock to the exact time at which you depress the SET CLK switch. You may take as much time as necessary to do this. Adjustments you make to the split clock will be included in the updated value when the SET CLK switch is released.
Here's the step by step method for setting the clock:
You may set or change the clock at any time, without regard to the rotary switch position or the current operating mode of the 797A.
Synchronizing the clock to a time standard can be accomplished in two ways. The first method is simply to turn on the 797A precisely when the official time standard ticks. The clock begins counting from exactly 12:00:00.
You can also synchronize the clock during normal operation of the 797A. To do so, depress and hold the SPLIT-SET CLK toggle switch down. Then, momentarily depress the RESET switch. The clock will become "live" again. (Do not release the SET CLK switch yet.) Now, activate any "+ / -" toggle switch to make the clock run slightly fast (+) or slow (-). When the clock is beating in synchronism with the time standard, release the "+ / -" switch. Repeat if necessary. After you are satisfied that the clock is synchronized to the time standard, release the SET CLK switch. Normal functionality of the "+ / -" toggle switches will resume.
To recap, follow this procedure to synchronize the 797A clock to an official time standard:
You may use this second method of synchronizing the clock as often as you like, without regard to the rotary switch position or the current operating mode of the 797A.
The ODOMETER display blanks leading zeros when mileage is less than 100 miles. Leading zero blanking will not occur after the 1,000-mile point.
In addition to the main odometer, the 797A has an auxiliary "trip" odometer. The auxiliary odometer is visible in the AUXILIARY display when ODO is selected on the switch to the left of the display. The auxiliary odometer can be used to measure free zones, incremental mileages, actions keyed to a mileage interval after a reference, pauses over a distance, etc. Its value can range from 0.00 to 99.99 miles. Every hundred miles the auxiliary odometer overflows to 0.00 mile.
FORWARD makes the odometers increase with each odometer transducer pulse. Use this mode while you are "on course" or whenever you want mileage to accumulate as you drive. When FORWARD is selected, the calculated time (explained later) will also increase as you drive.
REVERSE is used when you want the odometers to decrease when pulses are received from the transducer. Use this mode while returning from an "off-course" excursion or whenever you want mileage subtracted from the odometers as you drive. If you back up your vehicle to check a reference, you must use REVERSE to tell the 797A that you are going backwards -- the odometer transducer has no way of indicating this to the 797A. REVERSE also subtracts the correct amount from the calculated time.
PARK is used when you don't want to count pulses from the transducer. Use this mode for dead mileage or whenever you want to disregard incoming transducer pulses. While in PARK, the calculated time, as well as the odometers, will not change as you drive.
Selecting PARK is very useful when you need to make a U-turn or jockey your vehicle during a three point turn. For example, if you realize that you are off-course and must reverse your direction of travel, here's what you should do: Look for an easily identifiable landmark such as a sign, mailbox, or utility pole. As you pass by the landmark switch to PARK. Then turn around at a safe opportunity and select REVERSE as you pass the landmark in the opposite direction. This procedure removes the guesswork out of where to switch into reverse. When you return to the location where you left the correct course, switch directly to FORWARD. The odometers and calculated time will again equal official course values. The time of day clock will have continued counting normally, of course, so you'll have to drive faster than the given rally speed to make up for lost time.
When either PARK or REVERSE is selected, the ODOMETER display will blink off momentarily every second. This is a reminder of the fact that you are operating in a non-standard mode. The importance of selecting FORWARD after an off-course excursion is clear when the display is flashing.
Note: When you adjust the main odometer in this manner, the calculated time does not change. To automatically change the calculated time to coincide with adjustments to the main odometer, use the ODO & CALC TIME function as described in AUTOMATIC CALCULATED TIME ADJUSTMENTS. You can, of course, manually calculate the required change and separately modify the calculated time.
Generally, the internal, non-visible digits of the odometer are not of any concern because official mileages are given to a resolution of 0.01 mile. The rallymaster doesn't provide mileages with more resolution because it is virtually impossible for a rallyist running without the benefit of a computer to estimate a distance more precise than one hundredth of a mile.
There are occasions, however, when the internal digits of the odometer can be significant. For example, when setting the odometer to 0.00 at the beginning of the rally, the six internal digits could still contain non-zero values. You must clear the internal digits so the main odometer starts measuring from exactly 0.00000000 mile.
To clear the six internal digits of the main odometer, momentarily select the RESTART position on the CAST-RESTART toggle switch. When RESTART is selected, the non-visible digits of the main odometer are cleared to 000000. In this manner you truncate the main odometer.
You must also use RESTART at the beginning of each leg -- whether or not the official mileage restarts at 0.00. Here's why:
Rallymasters usually work on a rally over a period of time, measuring each leg separately. For the rallymaster, this procedure makes it much easier to design the course. Since the rallymaster measures only to a precision of 0.01 mile, there is always a small part of a mile (<0.01) that remains unaccounted for at the end of each leg. These small distances are not carried from one leg to the next by the rallymaster, even when the individual leg measurements are added together to form cumulative mileages for the entire rally. To exactly match the rallymaster's mileages you must similarly discard this small distance. Activating RESTART at the start of every leg accomplishes this task.
If you do not truncate the main odometer, there will be a slight error in your main odometer throughout each leg. Even in those circumstances where the rallymaster measured the entire rally route in one continuous run, you should still activate RESTART at each outmarker. This is because RESTART is also used to truncate the calculated time. See Truncating the Calculated Time for more information. Activating RESTART does not affect the auxiliary odometer.
IMPORTANT! As long as you have the RESTART position selected, the 797A will not accumulate any mileage in the main odometer; nor will the calculated time change.
The "delta adjustment counter" for the odometer keeps track of adjustments made to the odometer while using the blank position of the rotary switch. The AUXILIARY display can show this "amount of change" for the odometer if the center "D" position on the TIME-D-ODO toggle switch is selected. The value displayed is the same as that shown when the rotary switch is in the ODOMETER position, but shifted one digit to the left, revealing the thousandths of miles (x.xxx). Depressing RESET will clear the delta adjustment counter just like when the rotary switch is in the ODOMETER position.
As you make odometer adjustments while in the blank rotary switch position, the CALCULATED TIME is automatically corrected using the current CAST according to the distance adjustment made. It is as if you had actually driven the distance. If you don't want the CALCULATED TIME to be corrected, put the 797A in TRANSIT while you make the odometer adjustment. That is: CAST 0.0, then make the odometer adjustment, then CAST the current speed. (You will have to stop the vehicle in order not to miss odometer transducer pulses.)
Adjusting the main odometer while in the blank rotary switch position will work whether or not you have SPLIT selected. Note, however, that the CALCULATED TIME display will not update to the corrected value until you exit the split mode. The ERROR display on the driver's module is always updated. Adjustments to the main odometer do not affect the auxiliary odometer.
When the 797A is turned on, the odometer factors are initialized to a value of 060000. This value represents 0.00060000 mile. With a factor of 060000 the 797A accumulates 1.00[021] mile after receiving 1667 transducer pulses. This default value was selected because transducers often output about 1.667 pulses per mile when sensing two magnets attached to a wheel. Most installations do require the use of a different odometer factor.
To determine a base factor, you must drive an officially measured distance. Most rallyists use the official statute mileage posted along major highways. Alternatively, measure a course with the standard odometer in your vehicle. Select a course of about 10 miles.
Note: Although you will have an opportunity to compute a new factor at each rally, it is advisable to have your base factor as accurate as possible. Should you make a course error during the odometer check at the rally, your base factor must be used to start the rally.
After having driven an officially measured route, compare the official distance for the route to the distance measured by the 797A. Then use this formula to compute a new factor:
                            OFFICIAL DISTANCE x OLD FACTOR
               NEW FACTOR = ------------------------------
                                  MEASURED DISTANCE
In this formula the OLD FACTOR is the factor that was in the 797A as you traversed
the official measured route. When the 797A is turned on, the old factor defaults to
060000. After you compute a new value, select FACTOR on the rotary switch and
use the "+ / -" toggle switches to adjust the factor to the new value.
Note that a bigger factor will make the 797A display more miles after driving between two points. That is, if you need to accumulate more miles during passage of a route, the odometer factor must increase. Conversely, a smaller factor will make the 797A display fewer miles after traversing the route.
The factor can be set to any value in the range 000000 to 999999, although most installations use a factor from 025000 to 150000. Recheck your computations if you calculate a factor outside this restricted range. If your computations are correct, a poorly installed or defective transducer may be indicated.
IMPORTANT! Although the odometer factor can be set to values less than 025000, using a smaller factor implies that the 797A is receiving more than 4000 pulses per mile. Under such conditions, when traveling at high speeds, the 797A will receive pulses so quickly that it cannot count every pulse.
To change from one factor to another, you must change the active odometer input. To do so, rotate the rotary switch to the SELECT position. Then activate the "+ / -" 1.00 toggle switch. Each time you activate the switch, either up or down, the 797A will change the currently active odometer input. The ODOMETER display will show you which input/factor is active: "in 1" indicates that odometer input 1 and its associated factor is active; "in 2" means that input 2 and its associated factor is active. Notice that beneath the "+ / -" 1.00 toggle switch there is a designation ODO INPUT. This serves to remind you of the function of the switch when SELECT is chosen on the rotary switch.
Note: The currently active factor is shown in the CLOCK display when the rotary switch is in the SELECT position as well as the FACTOR position.
IMPORTANT! When you select FACTOR and use the "+ / -" toggle switches to adjust the active odometer factor, the inactive one is not adjusted. You must separately select and adjust both factors if you expect to use both of them.
The NEW FACTOR formula shown previously is used to compute a new factor at each rally. When figuring a new factor at a rally, the odometer check distance is used as the OFFICIAL DISTANCE and your base factor is the OLD FACTOR. After driving the odometer check route, your measurement for the route becomes the MEASURED DISTANCE.
After calculating a new factor for the rally, just enter the new value into the 797A. From then on your mileage measurements will match the rallymaster's.
You will have to calculate new factors for both odometer inputs of the 797A if you plan on using both inputs. Remember to adjust both factors and don't forget to switch back to your primary odometer input after adjusting the second odometer input factor. If you have only one transducer, it's a good idea to adjust both factors to the same value. Should you accidentally switch odometer inputs, you will continue to count mileage correctly. (Assuming, of course, that you've installed the odometer input jumper plug.)
You may compute new factors as often as you wish during a rally by making measurements between given official mileages. See Fine Tuning the Odometer Factor for more information.
Whenever AUTO FACTOR is selected on the rotary switch, the time of day clock is replaced by the current odometer factor, just like it does when FACTOR or SELECT is chosen. Also, as long as AUTO FACTOR is selected, the AUXILIARY display will show an "official odometer check mileage". (The official odometer check mileage is automatically displayed regardless of the position of the toggle switch next to the display.)
The official odometer check mileage defaults to 0.00 when the 797A is turned on. While AUTO FACTOR is selected, the "+ / -" toggle switches can be used to change the official odometer check mileage. The value you enter will remain unchanged until it is subsequently changed by you. (The official odometer check mileage is saved within the computer when the rotary switch is away from AUTO FACTOR.)
To execute an automatic factor calculation, reset the main odometer to 0.00000000 mile at the start of the odometer check, then select AUTO FACTOR on the rotary switch and enter the official odometer check mileage into the AUXILIARY display. At the end of the odometer check, push the RESET button once (make sure that AUTO FACTOR is still selected) and the 797A will compute your new odometer factors. The new currently active factor will then be shown in the CLOCK display and the official odometer check mileage will be entered into the main odometer. (The auxiliary odometer and the calculated time remain unchanged after an automatic factor calculation.)
Note: When you execute an automatic factor calculation, both odometer factors are corrected. It is not necessary to manually correct the inactive factor. If you have predetermined (and entered) two base factors, one for each odometer input, the 797A will automatically correct both values to compensate for the official mileage standard.
Here's the step by step method to execute the automatic factor calculation:
Here are some important points to remember when using the automatic factor calculation:
The 797A uses the currently active odometer factor when executing AUTO FACTOR. Although it doesn't matter what that factor is, you must not change the factor during the odometer check!
Be very careful when resetting the main odometer whenever AUTO FACTOR is selected. Do not depress RESET without selecting RESTART first! If you accidentally depress RESET first, you will activate the automatic factor calculation prematurely. Also, do not attempt to reset the official odometer check mileage to 0.00 mile with the RESET switch!
The automatic factor calculation uses the overall distance measured by the 797A when figuring the new factor. Do not split the 797A at the end of the odometer check and drive beyond the marker before depressing the RESET push-button! If you do so, you will inadvertently compute the wrong factors. The 797A always uses the actual mileage as the MEASURED DISTANCE, not the split mileage.
Do not execute AUTO FACTOR at several intermediate mileage references along the odometer check route. After the first activation of the function, you will calculate incorrect factors upon each subsequent execution. This is because the 797A assumes mileage discrepancies occur over the total distance measured, not between the mileage references. Repeatedly executing AUTO FACTOR is not a valid way to "zero in" on your odometer factors!
After executing an automatic factor calculation, the 797A requires that you make some (any) adjustment to the official odometer check mileage before the function is enabled again. As such, it is recommended that you do not change the official mileage after executing the function, thereby preventing unintentional activation of the procedure a second time.
VERY IMPORTANT! Always record the new factors computed by the 797A! If you should accidentally change the factors or lose power to the 797A, you will need these values to put back into the factor memories.
To illustrate further: On installations where the transducer senses two magnets mounted to a wheel rim, the wheel must turn 500,000 times before a factor adjustment of one count would make a visible correction in the odometers. Since a wheel turns approximately 1000 times per mile, you would have to drive about 500 miles before a one count adjustment in the factor would make a noticeable difference in the odometers. Obviously, corrections to the odometer factor usually mean adjusting them more than just a few counts.
Although you can simply align your odometer at each official mileage, you may decide to refigure your odometer factor in the middle of the rally. Changing your factor to adjust for these varying course conditions is called "fine tuning" the factor.
To fine tune your factor in the middle of a rally, use the NEW FACTOR formula as before. You will need two official mileage references and your odometer reading at both locations. Simply use the distances (official and measured) between the references in the formula.
Instead of using the NEW FACTOR formula to re-calculate the factor, it is sometimes easier just to do a quick fix "in your head". Let's look at the relationship between a mileage measurement error and the correction required in the odometer factor to eliminate the error.
Assume your factor is 065000. Then suppose your odometer has increased 1.00 mile after traveling 0.99 official miles. Your measurement of 1.00 was in error by 0.01 mile. That is, your measurement error is 0.01 mile, or 1%. This 1% figure is also the error in the factor.
A decrease of the factor by this same percentage is necessary to correct the factor. (Remember, decreasing the factor will make the 797A measure fewer miles.) Thus, reduce the factor 1% of 065000, or 650 counts. The correct factor would be 064350. (You must also adjust your odometer and calculated time to match the rallymaster's, as well as correct the inactive factor.)
If you had traveled 10.00 miles before noticing the 0.01 mile error, you would only have a 0.1% error. Your factor must then be reduced 0.1% of 065000, or 65 counts, to a new value of 064935.
Unfortunately, when an opportunity to fine tune the factor does occur, you will probably not have such easy to use "round numbers" for the mileage or factor. Still, the principle is the same. Just figure the percentage error in the mileage and change the factor by that same percentage.
Here's a more realistic example: Assume your factor is 072563 and that you reset the odometer to 0.00 miles at the beginning of the leg. You are currently working on an instruction that reads: "Turn on Reynolds at 4.32 miles."
When you turn on Reynolds you note that your odometer displays 4.30 miles, giving you an error of 0.02 miles. This is approximately a 0.02 mile error in 4.00 miles, or 0.5%. To correct the factor, increase it by 0.5%, or approximately 360 counts. Set your new factor to 072920, rounding off for ease of any future recalculations. Don't forget to adjust the inactive factor by the same percentage. Also, remember to correct both the odometer and calculated time!
The inaccuracies of this method are of little significance in the short run. You can always adjust the factor again, if necessary.
CAUTION! Mileage references at anything other than clearly labeled signs should be suspect as to their accuracy. Do not change your factor every time a reference mileage is given. Rather, align your odometer, if you must, and watch for a repeating trend. If your odometer continues to drift, you may then wish to change your factor.
It is also unwise to change your factor when noting only a 0.01 mile error between your odometer and the official mileage, no matter what overall distance has been driven. This is because the actual distance measured by the rallymaster may have been within inches of your measurement. A single pulse from the transducer could cause the apparent 0.01 mile error.
IMPORTANT! Do not use RESTART to synchronize your odometer in the middle of a leg!
Like the time of day clock, the calculated time can range from 12:00.00 to 11:59.99 (:59). The timing mode (i.e., "hundredths of minutes" or "seconds") you select for the time of day clock also selects the "counting" mode of the calculated time.
The calculated time is computed from the distance you drive and the average speeds given by the rallymaster. Since the calculated time is actually a computed value, rather than a clock or a stopwatch, the value displayed will not necessarily advance at a steady pace. Instead, the calculated time will count at a rate that depends on your progress along the rally route.
By comparing the value of the calculated time to the time of day clock, you can instantly determine whether you are "early" or "late" as you proceed along the course. If the calculated time is greater than the clock, you are early. If the calculated time is less, you are late. (As explained later, the ERROR display on the driver's module does this comparison for you.)
Like the odometers, the counting direction of the calculated time is determined by the FORWARD-PARK-REVERSE toggle switch: FORWARD makes the calculated time increase as you drive; REVERSE makes the calculated time decrease as you drive; and PARK stops the calculated time from changing as you drive. When you select REVERSE while retracing an off-course excursion, the calculated time decreases so that upon returning to the correct route, the calculated time will be correct for that location, irrespective your indirect way of getting there.
The 797A can also display an "auxiliary calculated time" counter. The auxiliary calculated time is the computed driving time from a previously selected point to your current location. The AUXILIARY display shows the auxiliary calculated time when you select TIME on the TIME-ODO toggle switch. Its value can range from -9.99 to 59.99 minutes.
The non-visible digits of the calculated time are usually not of any concern to the rallyist because official times are only given to a resolution of 0.01 minute. However, when setting you out-time at the start of each leg you will need to reset the internal digits to zero. Zeroing the internal digits of the calculated time insures that the 797A begins tabulating from the exact value intended by the rallymaster. If this is not done, the unknown internal digits from earlier computations will carry over into the next leg, causing the calculated time to increment too soon. The result would be a slightly incorrect (<0.01 min) calculated time during the leg.
Momentarily selecting RESTART on the CAST-RESTART toggle switch clears the internal less significant digits of the calculated time. In this manner you truncate the calculated time. Remember: RESTART also clears the internal digits of the main odometer.
IMPORTANT! As long as RESTART is selected, the 797A will not accumulate any calculated time or mileage in the main odometer.
As long as you hold the CAST-RESTART toggle switch in the CAST position, the 797A will split the odometers, the calculated time, and the time of day clock. This is a convenience for rallyists wishing to keep a log of distance and times at each CAST change. (You cannot adjust any value in the 797A while split in this manner, but you can select SPLIT on the SPLIT-SET CLK switch and make adjustments after releasing the CAST switch.)
After activating CAST, the value in the NEXT SPEED display is automatically set to the previous CAST. You will essentially see the two CASTs change places. In this manner, the 797A allows you to easily switch back and forth between the two CASTS.
Note: You must activate CAST at least once every 27 hours of calculated time. (This is because the 797A subtotals computed time in a memory register that overflows after 27.77 hours.) You don't actually have to change to a new CAST, it is only necessary to activate the CAST switch. You can "change" to the same CAST if you like.
This feature, called a "retroactive CAST change", deserves a further explanation: As you travel along the rally course, the 797A not only keeps track of your mileage in the main and auxiliary odometers, it also has another internal odometer that measures the mileage driven within the current speed section (i.e., the mileage since the last activation of the CAST switch). The 797A uses this "current speed section" mileage, and the current CAST as it computes the calculated time. This computation is performed repeatedly as you drive.
Imagine, if you will, that the 797A is a handheld calculator on which you manually compute your perfect passage time repeatedly as you progress along the course. In that scenario, you have the opportunity to use a different speed each time you make the calculation. If you use a different speed in your calculations, you change the result of the calculation. The 797A essentially does just that when you alter the current CAST to a new value.
The concept of altering the current CAST is best understood by example. Here's an application: Suppose you're driving at a previously defined CAST of 40 and the instruction you're working on reads: "CAST 30 at last sideroad prior to T."
How can you possibly know where to begin execution of this instruction if the sideroad and T intersections are not within sight of each other? You would never know which sideroad to use as the initiation point of the instruction until you find a T. Unfortunately, when the T is reached, it would be too late to make the CAST change. You would have to drive back to the sideroad, execute the CAST change, and return to the T. In so doing, you could be very late. Fortunately, you can use the retroactive CAST change feature so you don't have to retrace the distance to the last sideroad.
Here's what you should do: Enter a speed of 40.0 into the NEXT SPEED display of the computer. This is the same CAST as would be present in the SPEED display. At each sideroad you come to, activate CAST. Although you effectively won't be changing the CAST, you will be indicating to the computer a new location on the course to use each time it re-computes the calculated time. When you finally reach a T, do not activate CAST. Instead, select SPEED on the rotary switch and adjust the SPEED display to a value of 30.0 mph. The 797A will automatically correct the calculated travel time from the last sideroad to your current location.
When you become accustomed to the fact that you can alter the current CAST "after the fact", you will discover other ways to use this feature. For example, you might be on a rally that has a default CAST of 20 whenever you enter a gravel road. Normal CAST changes would be executed using preset speeds. However, if you suddenly enter a gravel road, activate CAST immediately. Then select SPEED on the rotary switch and adjust the SPEED display to 20.0 as you drive. The ability to alter the current CAST eliminates the need to stop the vehicle and fiddle with a series of switches before proceeding along the course.
You'll soon realize that it doesn't matter what value is preset in the NEXT SPEED display -- you can always alter the current speed after executing CAST. In fact, the NEXT SPEED feature is provided simply as a convenience for presetting the next expected CAST when enough time and information is given about the course. When a surprise CAST does occur, all you have to do is activate CAST and adjust the SPEED display to the correct value later. There is no loss of accuracy when using the 797A in this manner.
Note: Once you execute RESTART or AUTO FACTOR, you can no longer alter the CAST for the distance traveled prior to the execution point of those functions. (Executing either of those functions also restarts the internal odometer for the current speed section.)
Since the 797A does not skip numbers, the calculated time it displays may differ from the figure computed by the rallymaster whenever you are "in between" hundredths of a mile. The 797A can, at those times, compute a calculated time more precise than the official value. If effect, the 797A is too accurate!
Note that any discrepancy between the 797A and the official calculated time disappears whenever your mileage equals an exact hundredth of a mile. At each such point, both the 797A and the rallymaster compute the same value for the calculated time. Thus, the discrepancy will come and go with each incremental change in the odometer.
If you change CAST while in between hundredths of a mile, however, an apparent problem occurs. At that moment the calculated time for the just completed CAST section will be saved. Any discrepancy between the 797A's calculations and those of the rallymaster will, therefore, be permanently recorded. At this point, it would appear that the measuring accuracy of the 797A would cause an unrecoverable calculation error.
As it turns out, however, such errors are rarely observed. This is because the 797A ends up measuring a fractionally shorter distance for the new CAST section compared to the mileage used by the rallymaster. Unless the new CAST is substantially different in value from the previous one, the slightly reduced calculated time for the new section will offset the excess calculated time of the previous section.
If you are concerned about errors resulting from the high measuring resolution of the 797A, it is suggested that you change CAST at locations that are exact hundredth of a mile increments. That is, instead of executing a CAST change exactly at a reference, you may wish to execute the CAST just before or immediately after the reference.
You can often judge where the odometer will increment by watching its counting rhythm. If you think the odometer will increment a few feet after the reference, try waiting those extra few feet before activating the CAST switch. If you think the odometer will increment a few feet before the reference, and you believe the rallymaster would have measured the shorter distance, activate the CAST switch slightly early. Note that many rallymasters often do this when they measure official course mileage. Most rallyists, on the other hand, don't bother.
As mentioned above, the measuring accuracy of the 797A can cause an apparent discrepancy when changing CAST while "in between" hundredths of a mile. This is especially true when entering and very slow CAST sections. Unless you execute slow speed CAST changes at the exact mileages intended by the rallymaster, the 797A will compute a comparatively "erroneous" figure for the calculated time.
As an example, let's assume that you are at a CAST of 60 and that the rallymaster instructs you to CAST 10 at an "RXR" sign and then CAST 60 again at a "Do Not Pass" sign. As is usual for such slow speed sections, the rallymaster has also given the official mileages at the two signs. Let's assume the official mileage between the two signs is 0.14 mile.
If you activate the CAST switch exactly at the referenced signs, the 797A may, in fact, measure a distance of 0.145 mile. At a CAST of 10, the travel time for 0.145 mile is 0.87 minutes. For the 0.14 mile measurement used by the rallymaster, the travel time is 0.84 minutes. The greater accuracy of the 797A will effectively give you a 0.03 minute error.
As a result, it is recommended that you enter and exit slow speed sections (20 mph or less) at the exact official mileages given by the rallymaster; or, if official mileages are not given, that you activate the CAST switch when the odometer visibly increments slightly before, or immediately after, a reference. By doing so, you will likely execute CAST changes at the exact mileages used by the rallymaster.
Unfortunately, you will always experience some error in mileage measurement due to wheel slippage, lane changes, driving techniques, cutting the apex of a turn, etc. Since these mileage measurement errors also cause the calculated time to be incorrect, it will be necessary to correct both the odometer and calculated time when such errors occur.
Normally, correction to both the odometer and calculated time would be a three-step affair. You would have to correct the odometer, manually compute the required adjustment to the calculated time, and then make the adjustment to the calculated time. However, even if you're willing to do this work, the computation will often indicate an adjustment of thousandths or even ten-thousandths of a minute to the calculated time. Such adjustments cannot be entered into the 797A via the "+ / -" toggle switches. Fortunately, there is an easy and very precise method to automatically adjust the calculated time while correcting the odometer. The ODO & CALC TIME rotary switch position is used for this purpose.
                                            CHANGE IN ODOMETER
                CHANGE IN CALCULATED TIME = ------------------
                                                   SPEED
The speed used for the calculation is shown in the SPEED display whenever ODO
& CALC TIME is selected on the rotary switch. This "calculation speed" is another
number separate from the current CAST; it is visible only when you select ODO &
CALC TIME. Since the calculation speed defaults to the current CAST, you
generally won't notice a change in the SPEED display when you select ODO &
CALC TIME.
While making an ODO & CALC TIME adjustment, the ODOMETER and CALCULATED TIME displays will update instantly to show you the results of your adjustment. Also, the actual mileage change you make to the odometer will be shown in the AUXILIARY display. This "amount of adjustment" figure is automatically displayed regardless of the position of the toggle switch next to the display. By watching the AUXILIARY display, you can confirm the mileage correction you enter. Upon de-selecting ODO & CALC TIME, the AUXILIARY display will show 0.00 mile.
The AUXILIARY display will correctly show adjustments to the main odometer in the range -9.99 to 99.99 miles. If you input greater amounts, the displayed digits will still be correct. You can also keep track of the amount by noting the overall change in the main odometer.
ODO & CALC TIME adjustments are computed to a resolution of 0.0001 minute [0.001 second]. Thus, the adjustments are just as precise as if you had driven the distance.
Note: The ODO & CALC TIME function will work whether or not you have SPLIT selected; however, the CALCULATED TIME display will not show the corrected value until you exit the split mode. Of course, the ERROR display in the driver's module is always updated.
However, there are occasions when you need to make an ODO & CALC TIME adjustment using a calculation speed different from the current CAST. Here's an example: Suppose, in retrospect, you decide that you had experienced wheel slippage while driving on a gravel road earlier in the course. Suppose, too, that the CAST used on the gravel road was different from the current CAST. If you made an ODO & CALC TIME adjustment as usual to correct this error, you would change the calculated time using the current CAST -- the default calculation speed -- in the calculation. In this situation, however, you need to make the adjustment using the CAST driven while on the gravel road. Therefore, you must change the calculation speed used for the ODO & CALC TIME function.
Here's how you can do that: With ODO & CALC TIME selected on the rotary switch, depress and hold the RESET switch. Rather than resetting any value within the 797A, the "+ / -" toggle switches can now be used to alter the calculation speed shown in the SPEED display (instead of adjusting the ODOMETER). Remember that when ODO & CALC TIME is selected, the current CAST is replaced by the calculation speed. The ODO & CALC TIME calculation speed does not necessarily have to be the same as the current CAST.
When you change the ODO & CALC TIME calculation speed, the 797A automatically recomputes its correction to the calculated time. You may alter the calculation speed before or after you enter an ODO & CALC TIME mileage adjustment, providing you don't move the rotary switch away from the ODO & CALC TIME position.
When you do de-select ODO & CALC TIME, the calculation speed changes back to the current CAST. The next time you select ODO & CALC TIME, the calculation speed will be the current CAST again.
IMPORTANT! If you execute CAST or RESTART while ODO & CALC TIME is selected, any mileage corrections you are in the progress of making will be permanently recorded and the "amount of adjustment" figure in the AUXILIARY display will be reset to 0.00 mile. It will be as if you had also momentarily de-selected ODO & CALC TIME. Activating CAST or RESTART also automatically changes the calculation speed to the current CAST. Don't be surprised to see the calculation speed change value when you execute either of those functions while ODO & CALC TIME is selected.
Note: The ODO & CALC TIME function can make a calculated time adjustment up to 27.77 hours and still be correct. However, don't be concerned if you temporarily enter a speed and mileage combination (e.g. 0.5 mph and 15.00 miles) that computes a time greater than 27.77 hours -- the calculated time will be corrected when a more reasonable combination is chosen.
Remember: To adjust the odometer without changing the calculated time, use the ODOMETER position on the rotary switch; use CALC TIME to adjust the calculated time only.
The procedure for entering a transit zone is very simple: CAST 0.0 mph. That is, when you anticipate a transit zone, enter a CAST of 0.0 mph into the NEXT SPEED display. Then activate CAST at the start of the transit zone. The SPEED display will show a value of 0.0 mph. During passage of the transit zone, select CALC TIME and add the official travel time to the calculated time. After completing the transit zone, activate CAST again, having preset the next CAST into the NEXT SPEED display.
Note that you can use the retroactive CAST change feature upon entry into, or exit from, a transit zone. This gives you the advantage of deciding that the location where you entered (or exited) the transit zone was incorrect. Just change the SPEED display from 0.0 to the correct CAST; the 797A corrects the calculated time accordingly. Any distance you have driven in "transit" will be used to adjust the calculated time using the corrected speed. The 797A treats transit zones just like any other speed section.
Rather than using the transit zone capabilities of the 797A, some rallyists calculate the ideal average speed for the transit zone. (This can often be done from information given by the rallymaster.) This computed speed is then used as the official CAST during the transit zone. The advantage of this method is that while traversing the zone, the calculated time will operate normally, making it easier to judge your timing as you proceed along the course. If you use this method while traversing a transit zone, just CAST to the next speed at the end of the transit.
Transit zones are also used when traveling at a "warp speed" CAST. A warp speed CAST means that you must effectively drive at the speed of light, making your travel time for any rally distance essentially zero. By using the transit feature, you can drive the distance to the next CAST without increasing the calculated time. A warp speed zone is, therefore, treated like a transit zone except that it always has zero travel time, i.e., no adjustment is made to the calculated time.
The odometer alarm is used to notify you that a predetermined mileage has been reached. For example, use this feature when the rallymaster tells you, at the beginning of a rally, to change speed at a specific distance into the rally. You can preset the indicated mileage when you start the rally, and the computer will notify you when that mileage occurs. You won't forget to make the speed change when the alarm sounds.
The odometer alarm will sound for one second when the specified mileage is reached. You must change the alarm setting in order to re-arm. This prevents the alarm from sounding every 1,000 miles as the ODOMETER display cycles. It also stops unnecessary alarming on rallies that reset official mileage to 0.00 at the beginning of each leg.
Parameters in the driver's module update five times per second; except for the speedometer, which updates only once per second. Updating more often causes a bothersome flickering of the displays. Since the driver's module doesn't update as often as the main computer, you may notice a very slight delay in its display of new figures. This is normal.
Note: The 797A shows an error of 0.00 when you are exactly on time or up to half a hundredth of a minute early; an error of O.00 is displayed when you are up to half a count late. For all other values of early or lateness, the value shown will be to the nearest whole hundredth. By "splitting a zero in half", the 797A gives you the ability to enter checkpoints at the beginning or end of "perfect" time! (This "splitting a zero in half" functions in the same manner when you count in "seconds".)
When you are outside the displayable range for the error, the 797A will display "EEEE" up to six hours early, or "LLLL" up to six hours late. If you are more than one hour early or 10 minutes late, use the main computer displays of the clock and the calculated time to determine your error. In such cases, you'll be more concerned with course following than with your exact driving time error.
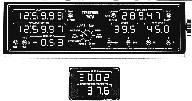
ODOMETER: A duplicate of the four rightmost digits in the ODOMETER display on the main computer. The value can range from 0.00 to 99.99 miles.
CAST: A duplicate of the SPEED display on the main computer. The current CAST will be shown here even when the ODO & CALC TIME calculation speed is displayed in the main computer's SPEED display.
SPEEDOMETER: Your course speed according to the official mileage standard. The 797A uses the odometer factor when computing speed. The displayable range is 0.0 to approximately 250.0 mph; however, the upper limit of the speedometer is dependent on the type of transducer you use. Most odometer transducers stop functioning correctly at about 125 mph (200 kph). There is also a lower limit to the speed that can be measured by the 797A. This is generally about 6 mph on vehicles with two odometer transducer magnets mounted on a wheel; it's about 12 mph if you use only one magnet. Below this limit, the computer automatically displays a speed of 0.0 mph. The speedometer may not work correctly if you use more than two magnets.
SPEED DIFFERENCE: The difference between the vehicle's actual speed and the current CAST. The displayed value is rounded-off to the nearest mile per hour. This figure can be used to confirm that you are at the correct rally speed. Ideally, the display should always read 0 (miles per hour difference). The displayable range is from -99 to 99. A minus sign is displayed when you are going less than the current CAST. A plus sign is assumed when traveling faster than the CAST.
Used in conjunction with the ERROR display, the speed difference lets the driver judge how to adjust vehicle speed as a checkpoint is approached. By maintaining a zero speed differential, you'll find it easier to hold an error of 0.00 minutes.
OFF: The lower display in the driver's module is turned off. Turning the display off may be desirable if the driver feels the information in the lower display is confusing.
The Auxiliary display can correctly show a value from -9.99 to 99.99 (units). When a parameter exceeds this range, the displayed digits will still be correct and the parameter will retain the correct sign. The plus sign is assumed.
The CASTs used for the main CALCULATED TIME display are used when computing the auxiliary calculated time. Adjustments made to the calculated time using the CALC TIME and ODO & CALC TIME functions also affect the auxiliary calculated time.
If you are setting up a rally, you will find the auxiliary calculated time useful when determining official leg times. All you have to do is reset the auxiliary calculated time at the start of each leg and drive the correct route, executing CAST changes at the correct locations. When you reach the planned in-line for the next checkpoint, the AUXILIARY display will show the official travel time for the leg. (Note that although the final displayed value for the leg time will be rounded off to the nearest hundredth (second), the calculated times for each CAST section in the leg are not rounded. This is considered proper procedure by most rallymasters.)
When ODOMETER is selected on the rotary switch, the AUXILIARY display can show the total adjustment you have made to the odometer. This figure includes all adjustments made while using both the ODOMETER and ODO & CALC TIME functions. When CALC TIME is selected on the rotary switch, the AUXILIARY display can show the total adjustment you have made to the calculated time using the CALC TIME function. IMPORTANT: Adjustments made via the ODO & CALC TIME function are not included.
The delta counters can be reset to 0.00 by depressing the RESET switch. The two counters are reset independently: you can reset the odometer delta counter only when ODOMETER is selected on the rotary switch; you can reset the calculated time delta counter only when CALC TIME is selected.
When a rotary switch position other than ODOMETER or CALC TIME is chosen while "D" is selected, the AUXILIARY display generally shows dashes (--.--) instead of a numerical value. However, remember that when ODO & CALC TIME is selected, the AUXILIARY display automatically shows the distance adjustment you are making, regardless of the position of the TIME-D-ODO switch. Similarly, recall that the official odometer check mileage is automatically shown in the AUXILIARY display whenever AUTO FACTOR is selected.
There are four display intensities, plus off. The displays are at their brightest level when the 797A is turned on. The displays get dimmer each time you select the "-" toggle switch position; they get brighter each time you select the "+" position. The brightest setting is used during daylight hours. The dimmer settings are generally used during evening or night rallying.
The displays will turn off when attempting to dim them below their lowest intensity level. When the displays are turned off, there is no indication that the instrument is running. All functions continue to operate internally, however. When turned off, the displays will turn back on with the activation of any "+ / -" toggle switch, regardless of the position of the rotary switch. It is also important to note that activating a "+ / -" toggle switch to turn the displays back on will not change the value of any parameter in the 797A, even if the rotary switch is in a position other than SELECT. This prevents accidental alteration of a parameter while the displays are turned off.
For the same reason, the "+ / -" toggle switches should be used only when you are certain of the rotary switch position. For example, an adjustment to the odometer while ODO & CALC TIME is selected on the rotary switch will also change the calculated time. If you had wanted to change the odometer only using the ODOMETER position on the rotary switch, an error will have been entered into the calculated time. Although you can recover from this kind of mistake, you can do so only if you take notice of it. Even then, because are in the midst of a rally, panic usually ensues. It's better to make the adjustment correctly the first time.
Because of this potential for error, the 797A is programmed to alert you while it is operating in a non-standard mode or when you select certain rotary switch positions. To alert you, the 797A will either flash the entire display or just the decimal point (and colon, if appropriate) in the relevant rally parameters. The list below shows which displays are affected:
| Operating Mode | Flashing Display: |
|---|---|
| PARK | ODOMETER |
| REVERSE | ODOMETER |
| Rotary Switch Position | Flashing Decimal Point In: |
| SPEED | SPEED |
| NEXT SPEED | NEXT SPEED |
| CALC TIME | CALCULATED TIME |
| ODOMETER | ODOMETER |
| ODO & CALC TIME | ODOMETER, SPEED, and CALCULATED TIME |
In addition to flashing the odometer display while in PARK or REVERSE, the beeper will sound briefly every 10 seconds. If you wish, this beeping may be temporarily disabled by selecting ODO ALARM on the rotary switch.
Generally, it's best to leave the rotary switch in the NEXT SPEED. In this position, accidental activation of a "+ / -" toggle switch will not change any crucial rally parameter. Some rallyists always return the rotary switch to the SPEED position because it's next to the two positions used most often: NEXT SPEED and CALC TIME.
These examples are not intended to answer all rally problems, but rather to stimulate your imagination in the ways the 797A can be used. As always, there are exceptions to any rule, so make an effort to understand the reason for each procedure.
Then follow these steps to start the rally:
After receiving all pertinent information from the checkpoint workers and confirming mileage and times, you're ready to start the next leg of the rally. The steps you must take before starting the next leg vary according to the mileage counting method used by the rallymaster.
The recommended checkpoint procedure for a rally that resets official mileage to 0.00 miles at each leg outmarker is as follows:
In Step 6 there are actually two ways to enter the CAST: you can preset the CAST into the NEXT SPEED display and activate CAST; or, you can select SPEED on the rotary switch and adjust the CAST in the SPEED display. You can use the second method because you have executed RESTART.
(Executing RESTART also effectively executes CAST except that the "next speed" doesn't replace the current CAST. This is done to make sure that mileage driven before the starting point of the new leg won't influence the calculated time if you make a "retroactive CAST change" after starting the leg.)
IMPORTANT! To reset the ODOMETER to 0.00, you should activate RESTART and RESET at the outmarker, rather than adjusting the ODOMETER to 0.00. Remember that RESTART also truncates the calculated time. You'll want to truncate the calculated time to start the next leg with the exact value intended by the rallymaster.
If mileaged outmarker are provided and your out-time is from that point, use the steps outlined in "When Official Mileage Resets to 0.00 at Leg Outmarker" except that in Step 4 activate RESTART and then adjust the ODOMETER (using the ODOMETER position on the rotary switch) to the official outmarker mileage. (If you do actually reset the ODOMETER to 0.00, that's OK ... it just takes longer to set the official mileage.)
When outmarker are not present, or whenever your out-time is given from the in-line of a checkpoint, use the steps outlined in "When Mileaged Outmarker Are Not Provided", except that in Step 3, adjust the ODOMETER to the official mileage for the in-line (provided on the checkpoint critique slip), rather than 0.00 miles. If desired, in Step 1, you could activate SPLIT and CAST simultaneously (rather than SPLIT and RESTART) if you don't want to truncate the ODOMETER and CALCULATED TIME. This will still allow a "retroactive CAST change" back to the in-line if the critique slip changes the starting CAST for the new leg.
As is true for all legs of a rally, the 797A calculates the travel time for a DIYC leg using the distance you drive and the CASTs you enter. Since the travel time that the 797A calculates for a DIYC leg is not dependent on actual driving time or speed, you can usually proceed along the course at your own pace. Of course, you must arrive at the end of the DIYC early enough to begin the next leg of the rally on time.
The general procedure for executing a DIYC is as follows:
Rebuilding a leg is actually very simple. Follow this procedure:
IMPORTANT! Don't forget to re-enter your odometer factors if you lost power to the 797A!
Fortunately, rebuilding a leg is rarely necessary in the midst of a rally. Although the procedure is simple, the pressure of staying on time after a power failure causes panic in the soul of every rallyist.
If a speed change occurs at the mileaged turn or landmark, you can still use the ODO & CALC TIME function, but the procedure is a bit more complicated. Here's what you should do:
If you can foresee that the official mileage will appear on the 797A before the reference is reached, there is one other method for aligning the odometer and calculated time at a mileage reference: when the odometer on the 797A reads the official mileage, put the 797A in PARK until you reach the reference. By doing this, you are simply preventing the 797A from counting the excess mileage. When you reach the reference, select FORWARD again.
* Since you executed the CAST change at the correct mileage, the measured distance for the previous section was correct. The mileage error will always be in the new CAST section. The current CAST must, therefore, be used as the calculation speed for the ODO & CALC TIME function.
Clean the 797A often. Front panel switches and rear panel connectors can eventually be damaged by accumulations of dirt and grime.
Be careful when cleaning the polycarbonate front panels of the main computer and remote driver's module. Although they are protected from fingerprints, minor scratches, and chemical damage by a special protective coating, abrasive grit and certain cleaning chemicals will mar the surface. To remove fingerprints, use a mild plastic cleaning solution. Do not use chemical solvents, bathroom and kitchen cleansers, or any aromatic 1-hydrocarbon based cleaner. Use a soft cloth and wipe off accumulated dirt carefully to prevent scratches.
CAREFUL! Never spray a cleaner directly on the 797A; rather, spray a cloth and then clean the panels with the damp cloth. If you spray a cleaner directly on the front panel of the 797A, some of the liquid will enter the switches and cause internal corrosion and eventual failure of the switch mechanism.
Do not open the 797A to clean inside. You will void the warranty. If your 797A needs to be cleaned internally, return it to your TIMEWISE dealer.
If you feel that the contacts in the rear panel odometer input and remote display modular jacks need to be cleaned, you may use an aerosol spray of pure Freon (trichlorotriflluoroethane). Freon solvents that contain denatured ethyl alcohol or isopropyl alcohol are also OK. However, there absolutely must not be any additives such as methanol, methylene chloride, acetone, 1, 1. I -trichoroethane, or riitromethane, in the spray. Take special precautions when selecting a cleaner, as some sprays used for cleaning electrical contacts (e.g., television tuner cleaner sprays) usually contain unspecified additives that lubricate metal surfaces or dissolve waxes and heavy deposits of grease. You will dissolve and/or soften some of the plastics (especially the polycarbonate front panel, polycarbonate modular plugs, and polystyrene LEDs) in the 797A with those chemicals. Also, do not touch the contacts in the modular jacks with anything (such as a cotton swab) as you may bend the wires.
DO NOT USE A TV TUNER CLEANER ON THE 797A. SUCH FORMULATIONS CONTAIN UNSPECIFIED LUBRICATING OILS AND ADDITIVES THAT WILL DAMAGE SOME OF THE PLASTICS IN THE 797A. IN ADDITION, ELECTRICAL CONTACTS IN THE UNIT WILL BE COATED WITH THE OILS.
ONE FINAL WARNING: Some chemicals used in insect repellents can damage the front panel and/or paint on the 797A. Do not let these chemicals contact the 797A, as you can ruin the appearance of the instrument.
IMPORTANT! If static is a problem in your vehicle, we suggest you treat the inside of your vehicle with a static dissipating chemical.
As a general rule with all electronic instrumentation, never plug or unplug accessories while the unit is turned on. The 797A carries the same warning. Damage to the 797A or the accessory may occur as voltages are randomly applied to internal components. The 797A and its accessories are engineered with protection against such random power surges, but following the above guideline reduces the possibility of damage.
Most problems are caused by incorrect wiring techniques used during installation of the 797A. Improper operation of rally equipment is often traced to faulty wiring or a defective charging system within the vehicle itself. Ideally, the 797A should be connected directly to the battery terminals. Such a practice reduces susceptibility to low voltage "brown outs" often produced when starting a vehicle with questionable wiring.
You must be absolutely certain that power is never interrupted to the 797A. Since it is often impractical to run power wires directly to the battery, your best protection against a power failure is clean, secure wiring. A loose connection to the battery or a power distribution point in the wiring harness is a common problem. If a connection is loose, road and engine vibrations can cause an intermittent loss of power to part of the vehicle. All connections must be as clean, secure, and direct as possible.
IMPORTANT! A proper connection to the ground lug on the rear of the 797A is extremely important. The wire used must be a heavy gauge and as short as is practical. Make certain the chassis location you choose for this connection provides an easy path for draining static discharges and high-frequency noise. Faulty ground connections throughout a vehicle chassis are common.
Make certain that the in-line fuse holder has some freedom of movement. Power to the 797A can be interrupted if the wires are pulled: a spring in the fuse holder compresses, thereby causing loss of electrical contact. Also, be careful when routing the wires around the glovebox or among control levers. The wires may be pulled when the glovebox is opened or control levers are moved. Wires placed below floor mats or carpeting can be accidentally pulled.
Some rallyists experience trouble with the 797A only when starting their vehicle. This is often caused by an ignition switch that momentarily breaks contact with a circuit as you turn the key from "RUN" to "START". During this short period the 797A can "lockup" or lose data. Confirm that power to the 797A is not disrupted as you start the vehicle's engine. Sometimes the circuit is not disconnected, but the voltage supplied to the circuit is lowered to an unacceptable level while the starter motor operates. This can also cause a failure.
Make certain that your battery charging system is operating properly and that the cables between the battery, the alternator, and the voltage regulator are securely attached. If any of these cables have loose connections, the alternator can create what is termed a "load dump". When that happens, voltage spikes of 400 volts can be generated. The 797A has circuitry to guard against some of this destructive energy, but continual exposure to that high voltage will rapidly deteriorate the protection circuitry and the 797A can be damaged.
When the 797A is disconnected from your vehicle, keep the electrical power connector free of dirt, oil and moisture. Contamination might cause a future intermittent power failure. This warning applies to odometer transducer and driver's module connectors as well.
Electrical noise (formally referred to as Electromagnetic Interference or EMI), comes in two basic varieties: "radiated" and "conducted" noise. Radiated noise is caused by anything that produces a spark. The resulting electromagnetic noise is often referred to as "Radio Frequency Interference" (RFI). Any device that broadcasts a signal also produces RFI. Such interference can enter into an instrument directly through its case or by inducing extraneous voltages in power supply and accessory cables.
Conducted noise is an undesirable voltage transient that "pollutes" the power and/or ground lines of the instrument. Conducted noise is produced when switching another electrical device on or off. A static discharge to the front panel of an instrument is also conducted noise.
Although each of these types of EMI has particular modes of entering the 797A, the end result is the same: the instrument will fail to function correctly -- either temporarily or permanently.
Electrical noise originates from ignition systems (yours as well as those of other vehicles), CB and business band radio transmissions, cellular telephones, lightning, high tension wires, static discharges, microwave receivers (radar detectors), microwave transmitters (police radar and communication links), OEM trip computers, computerized dashboards, microwave ovens, AC and DC motors (blower motors and wiper motors are particularly nasty), etc. Electrical noise can cause the 797A to fail in a variety of ways. Some modes of failure are: meaningless information in the displays, erratic odometer measurements (usually too high), locked-up displays, reset of the computer to start-up status (although this is often caused by intermittent power), or a change in the counting rhythm of the clock. Unfortunately, electrical noise problems often show up after long periods of correct operation.
Spark plug wires, CB radios, business band radios, cellular telephones, and static discharges are common sources of radiated noise. Alternators, voltage regulators, blower motors, power seats, air conditioners, electronic fuel injection systems, and microprocessor controlled instrumentation generate electrical noise that pollutes the 12-volt power system of a vehicle.
One sure sign that you have a problem with excessive electrical noise is a "ticking" sound you hear when listening to the vehicle's AM radio. This ticking sound is often caused by a faulty ignition system. It can enter the radio through the power connection (conducted noise), or via the antenna (radiated noise). (Note: You can have an electrical noise problem even when your AM radio reception is fine. Some radios filter out electrical noise better than others.)
To determine whether the ticking is caused by conducted or radiated noise, you can perform a simple test. Disconnect the radio antenna and listen for the ticking sound again. If you continue to hear the ticking sound over the background static on the radio, the interference is probably coming over the power line as conducted noise. If the ticking is eliminated after the antenna is disconnected, the noise is being received by the antenna as radiated noise (RFI).
If the problem is conducted noise polluting the 12-volt power system, appropriate electrical components can be used to "clean-up" the power lines. The 797A is designed with an electrical filter network to remove most of this interference. However, with excessive interference you will need to add another noise filter to the power lines.
If the noise is being picked up by your radio's antenna, the problem is more difficult to solve. Since such interference is received by the antenna, it means that an RFI field literally surrounds the entire vehicle. Any instrument placed in the vehicle is subjected to the same stray RFI field. In the radio, excessive interference causes an aggravating noise. In the 797A, the interference can cause complete disruption of the instrument.
There are two ways to stop the effects of RFI on the 797A. One is to protect the instrument from high levels of such interference. The other is to prevent the interference from being generated in the first place, or at least reduce its level.
Several design features of the 797A are very significant in preventing RFI from affecting its operation. The metal case of the 797A shields its circuitry from much RFI. Internally, the printed circuit board layout and component selection absorb most of the remaining RFI. The cable that connects the driver's module to the main unit is shielded to reduce pick-up of RFI. TIMEWISE odometer transducer cables are also shielded. For protection beyond what these features provide, you would need to use military style connectors, cables, and housings.
The power cable at the back of the 797A may pass through a dark gray metallic ring just prior to entering the rear panel. There may also be a ring on the cable from the odometer transducer. These rings, termed "ferrite beads", prevent some RFI from entering the 797A along the cables. For the ferrite beads to be most effective in removing this RFI, they must be located next to the 797A. If ferrite beads are present on your 797A, be sure they do not slide down the cables.
There are several procedures you should follow that help prevent radiated noise from affecting the 797A. Unless you-follow these procedures, you will likely have electrical noise problems!
Solid spark plug wires radiate incredible amounts of RFI. If your vehicle has solid spark plug wires, you must replace them with carbon resistance wires or use shielded solid wires. Suppressor resistor spark plugs or spark plug caps also help to reduce ignition noise. Don't be misled by an apparent lack of trouble when using solid wires. Ignition noise can be very elusive -- occurring only on humid days, during hard acceleration, or when your engine is cold, hot or out of tune.
The vehicle's battery charging system is also a source of RFI. Most vehicles have, as standard equipment, noise suppressing capacitors and/or chokes on the alternator and voltage regulator that absorb this RFI. If your vehicle is lacking these components, contact your automobile dealer or a local installer of quality vehicle sound systems for such components and advice on how to install them.
Do not attach the 797A's black wire directly behind the computer and run the red wire a long distance to the fuse box or battery. By doing so, you create a huge loop antenna that can pick up all manner of RFI. Such interference cannot be filtered out of the power line without prohibitively expensive electronics. Attach the power leads to the vehicle as close together as possible.
Even properly connected power leads pick up some RFI. One of the best ways to remove interference is to twist the two leads together -- about one turn for every inch of wire. By doing so, the interference on each wire is canceled out. You must do this!
The 797A must be properly grounded to the vehicle via the grounding lug on the rear panel. A poor ground connection will increase the likelihood that the 797A will be affected by static discharges or RFI.
Make certain the battery's negative terminal is firmly connected to both the chassis and engine block. Do not overlook this important point. A poor chassis ground connection reduces the voltage supplied to the 797A and simultaneously lets the ground wire act as an antenna.
If you do connect the 797A power wires directly to the battery, you may consider replacing the two wire cables supplied with the 797A with a shielded, twisted pair cable. Such a shielded cable will give you added protection against RFI. When installing shielded cable, connect the shield drain wire to both the chassis near the battery (or directly to the negative terminal of the battery) and to the grounding lug on the rear of the 797A.
The preceding discussion is not meant to cause undo concern about the ability to use the 797A in a typical rally vehicle. Rather, this information is to aid you should a problem occur. If the 797A reacts to electrical noise once, you can bet it will happen again unless the offending electrical noise is eliminated.
Electrical noise problems can be solved. Please check--and double check--your installation before calling your TIMEWISE dealer.
On a hot summer day with little wind blowing, the temperatures in a closed vehicle can exceed 160 degrees F. In that environment, when the 797A is on and the LED displays are at their brightest setting, the instrument will exceed its maximum operating temperature. Should the 797A overheat, the life of internal components will be shortened considerably. A thermal shut-off feature built into the voltage regulator on the 797A should stop operation before the instrument is permanently damaged. (The 797A will lose all data if this happens.) If the 797A is exposed to temperatures over 250 degrees F. even momentarily, the operating firmware will be altered.
To prevent overheating on hot days, dim the displays and park your vehicle in the shade during lunch breaks, rest stops, or whenever you leave your vehicle for substantial lengths of time.
The rear panel of the 797A will get warm; however, it should never get too hot to touch. Nor should it get so hot that it will damage anything that may touch it. If the rear panel of the 797A is so hot that you cannot keep your fingers on the metal, you are overheating the unit.
Fresh air must be allowed to cool the rear panel and to circulate through the instrument. Normally, there is enough air movement while driving; but, be careful if the instrument is placed in the glovebox or recessed into the dashboard as air circulation will be restricted. Do not block the ventilation grill across the top of the instrument.
If you use an odometer transducer other than one supplied by TIMEWISE, be forewarned that the higher power required by some designs (particularly photoelectric types) will cause an internal voltage regulator to heat up. Drawing over 60 milliamps of current (at 5 volts) for the odometer transducers can overheat the 797A.
This special "Intelligent CAST" option automatically re-computes the calculated time whenever you activate the CAST switch, while temporarily ignoring any partial hundredths of a mile measured by the odometer. Essentially the 797A measures mileage, in high resolution (0.00000001) while you traverse a CAST section, yet reverts to the rallymaster's resolution (0.01) at the moment of a CAST change. After the CAST change, any temporarily ignored partial hundredths of a mile is applied to the next CAST section. In this manner, each CAST section always begins and ends at exact hundredth of a mile increments.
To enable Intelligent CAST (on 797A's equipped with this option), hold down SET CLK and concurrently activate CAST. The 797A will change to Intelligent CAST mode. The rightmost decimal point in the Calculated Time display will illuminate indicating that the Intelligent CAST mode is in use. A CAST will not be executed as you do this. To disable the feature, hold down SET CLK and activate CAST again. This allows you to use Intelligent CAST for an entire rally, or only for selected sections.
As an example of how a 797A equipped with the Intelligent CAST option operates, consider the same scenario described in Using Slow Speeds. Upon exiting the CAST 10 speed section, the 797A will re-compute the calculated time using an exact 0.14 mile distance, temporarily ignoring the extra 0.005 mile. The calculated time for the slow speed section will be 0.84 minutes--exactly the same figure computed by the rallymaster. The unused 0.005 mile will then be applied to the following CAST 60 section. Thus, you may use very slow speeds without concern about where [within the intended hundredth of a mile] you make CAST changes.
However, it must be pointed out that a disadvantage of this option is that you must execute all CAST changes within the intended hundredth of a mile. If you execute a CAST change just inches before the intended hundredth, the 797A will have measured the CAST section incorrectly by a full 0.01 mile. The calculated time would then definitely be incorrect.
Note: If your 797A is equipped with the Intelligent CAST option, you may see a correction to the calculated time at the recomputing when you change CAST. This is because the 797A, while recomputing the calculated time, may be temporarily ignoring some mileage (<0.01) it had measured up to that point. The calculated time may change as a result of using this "truncated" odometer mileage. Note that you won't often observe the correction because the recomputed calculated time will also automatically include the travel time for that short distance at the new CAST. If the new CAST is close in value to the old one, the correction to the calculated time may not be evident. However, if you switch to a significantly different CAST, it is possible to see the calculated time correct itself by a count or two. Remember, too, that the 797A is split while CAST is activated, so the change may be evident only upon release of the switch.
Except as specified below, this warranty covers all defects in materials and workmanship. The following are not covered: Damage as a result of accident, misuse, abuse, or as a result of installation, operation, modification, or service on the equipment; damage resulting from failure to follow instructions contained in the User's Manual; damage resulting from the performance of repairs by someone not authorized by TIMEWISE; damage caused by direct exposure to liquids, solvents, salty air, or corrosive gases; damage caused by exposure to excessive amounts of dust or dirt; damage caused by exposure to temperatures above or below the storage or operating limits of the equipment; or normal wear of the instrument enclosure, connectors, or cables.
While under warranty, TIMEWISE will service, repair, replace, or adjust any defective part or parts free of charge, when the instrument is returned freight prepaid to TIMEWISE. The purchaser is responsible for insuring any equipment returned and assumes the risk of loss during shipment.
In no event will TIMEWISE be liable to the purchaser or any user for any damages, including any incidental or consequential damages, expenses, lost profits, lost savings, or other damages arising out of the use or inability to use this equipment. This exclusion includes damages that result from any defect in the firmware or User's Manual.
Equipment to be repaired must be returned freight prepaid. All equipment must be packaged with sufficient protection against shipping damage. You are responsible for transportation charges when returning equipment. Insuring the shipment is recommended. Warranty repairs will be returned via UPS ground freight prepaid. Non-warranty repairs will be returned via UPS ground COD (repair charges, freight, and COD collection fee), cash only, unless prior arrangements have been made. Alternate shipping methods can, or will, be used as necessary to assure a prompt and safe delivery.
Repairs on equipment beyond the effective date of warranty or when abnormal usage has occurred will be charged at applicable rates. TIMEWISE will submit an estimate for such charges before commencing repair, if so requested.